
You’ve done it – you’ve ordered your brand-new Addmotor e-bike. The thrill of waiting for that delivery truck to pull up is unbeatable. You’ve tracked your package, counted the days, and now, your e-bike is finally here. But before you hit the streets, you’ll need to get through one crucial step: assembly.
Don’t worry – this isn’t like putting together an impossible piece of IKEA furniture. With the right Addmotor assembly instructions, the process is simple, even if you’ve never built a bike before.
In fact, this guide is designed for e-bike assembly for beginners, walking you through the unboxing, the tools needed for e-bike assembly, the step-by-step setup, and even some common e-bike assembly mistakes to avoid.
And here’s a bonus: as you’re setting up, don’t forget that your purchase could be even sweeter when you shop with an Addmotor coupon code free shipping.
Let’s dive in.
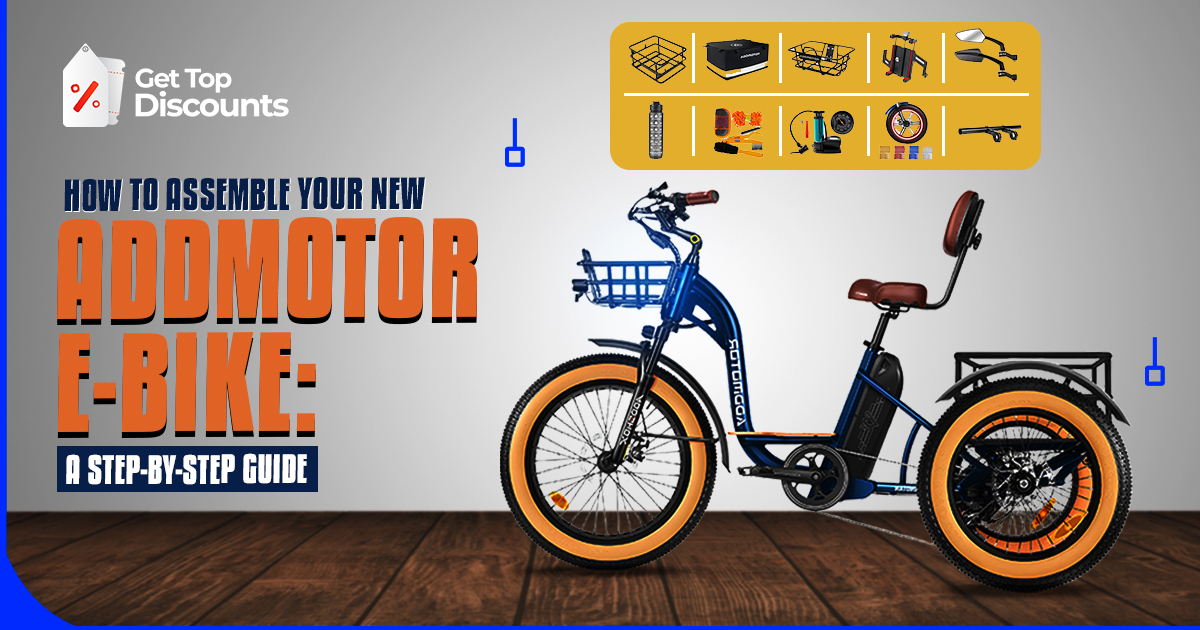
Step 1: The Addmotor Unboxing Experience
Unboxing your e-bike is half the fun. Addmotor does a great job of packaging their bikes securely, so you’ll notice the sturdy box, foam padding, and protective covers over delicate parts.
Here’s what you should find inside your package:
- The e-bike frame (partially assembled)
- Front wheel
- Handlebars
- Pedals
- Seat post and saddle
- Charger and battery
- Assembly toolkit (sometimes included, but it’s good to have your own just in case)
- Instruction manual
Related: These instructions are perfect for putting together your new Addmotor CityTri E-310.
Take your time removing everything from the box. It’s tempting to rip through packaging in excitement, but careful unboxing prevents accidental scratches or damage. Place all the parts on a clean surface and double-check that nothing is missing.
Step 2: Tools Needed for E-Bike Assembly
Most Addmotor bikes come with the basic tools required, but for a smoother assembly, here’s what you’ll want on hand:
- Allen wrenches (sizes 4mm, 5mm, and 6mm)
- Adjustable wrench
- Philips head screwdriver
- Tire pump (for adjusting tire pressure after wheel installation)
- A bike stand (optional, but it makes setup easier)
Pro tip: If you’re missing any tools, don’t panic. A basic multi-tool kit from your local bike shop will cover almost everything.
Step 3: Addmotor Setup Guide – Step by Step
Now for the fun part: putting everything together. This Addmotor setup guide will walk you through it, one piece at a time.
1. Install the Front Wheel
• Position the bike frame carefully on a flat surface.
• Position the front wheel into the fork dropouts.
• Lock it using the quick-release lever or axle nuts.
• Pump the tire to the recommended PSI.
2. Mount the Handlebars
• Put the handlebar stem into the head tube.
• Tighten securely using your Allen wrench.
• Adjust to your favorite riding position before tightening all the way.
3. Install the Seat Post and Saddle
• Put the seat post into the seat tube.
• Set height to your preferred level.
• Tighten the clamp using your Allen wrench.
4. Install the Pedals
- Look for “L” (left) and “R” (right) markings.
- Thread each pedal into the crank arms carefully.
- Tighten with your wrench, but don’t overtighten.
5. Attach the Battery
- Slide the battery pack into its designated mount.
- Lock it in place with the key provided.
- Connect wiring if needed.
Important: Pay close attention to the battery installation section, and reference our Addmotor Battery Care Guide.
6. Double-Check All Bolts
Go over every connection point – wheel axles, handlebar, saddle, pedals, and battery mount. Loose bolts are the number one reason for first-ride issues.
Step 4: Common E-Bike Assembly Mistakes to Avoid
Even with clear Addmotor assembly instructions, beginners can make a few slip-ups. Here are some pitfalls to steer clear of:
- Overtightening bolts – This can strip threads and damage components. Tighten firmly, but not excessively.
- Forgetting to check brakes – Ensure front and rear brakes are aligned and responsive.
- Skipping tire pressure checks – Underinflated tires affect performance and battery efficiency.
- Incorrect pedal installation – Cross-threading pedals is a common beginner mistake. Always match left to left, right to right.
- Battery mishandling – Never force it in or store it incorrectly.
Step 5: DIY E-Bike Setup Confidence Check
Before your first ride, run through this DIY e-bike setup checklist:
- ✅ Wheels spin freely without wobble
- ✅ Brakes engage smoothly and evenly
- ✅ Handlebars are centered and tight
- ✅ Saddle is at the correct height
- ✅ Pedals are secure
- ✅ Battery is locked and charged
If you ticked off all these boxes – you’re road-ready.
Beyond Assembly: Adding Accessories
Getting your Addmotor e-bike set up is just the starting point. Once the main build is done, most riders start thinking about how to make the bike fit their lifestyle a little better. That’s where accessories step in.
After basic assembly, see our guide on installing essential Addmotor accessories.
Here are a few upgrades that Addmotor riders often find useful once their bike is assembled:
1. Racks and Cargo Options
Running errands or carrying groceries? A rear rack or front basket makes life a whole lot easier. Since many Addmotor bikes are rack-compatible, it’s simple to attach panniers, baskets, or even a child seat.
Pro tip: When fitting racks, check that nothing interferes with the rear wheel, brakes, or the battery mount.
2. Lighting Upgrades
While Addmotor bikes usually come with standard lights, brighter options are worth considering if you ride at night. A high-lumen headlight gives you better road visibility, and smart tail lights with brake indicators make you more noticeable to drivers.
DIY tip: Keep wiring neat and double-check every connection when adding aftermarket lights – it’ll save you headaches later.
3. Phone Mounts and GPS Holders
Want easy access to maps or fitness apps? A handlebar phone mount turns your e-bike into a practical navigation tool. City riders, in particular, love this upgrade since it makes commuting less stressful.
4. More Comfortable Seats and Posts
If you’re planning longer rides, comfort is key. Many owners switch out the stock saddle for something wider or more cushioned. Others go a step further with suspension seat posts that help absorb bumps for a smoother ride.
5. Fenders and Mudguards
Wet weather cyclists understand the agony of mud stripes up the back. Fenders make you and your bike cleaner in rain or mud. Fortunately, Addmotor frequently frames fender mounts into frames, so installation is typically quick and trouble-free.
6. Security Locks
E-bikes are an investment, so don’t cut corners on security. A heavy chain or U-lock lock is essential. For added peace of mind, some cyclists include GPS trackers so they can always keep track of their bike.
7. Additional Batteries and Chargers
Prepping for long-distance rides? Having a spare battery or quick charger can be a lifesaver. Just ensure it’s compatible with your particular Addmotor model, and always follow the proper installation procedure.
8. Mirrors and Safety Gear
Installing mirrors on your handlebars allows you to check traffic without having to twist your head back and forth. Combine those with reflective tape or a high-visibility jacket, and you have another level of protection on the road.
Frequently Asked Questions About E-Bike Assembly
Well, it’s not as daunting as it seems. You typically begin with the fitting of the front wheel, followed by arranging the handlebars, fitting in the seat post, and adding the pedals. Next, inspect your brakes and add some air to your tires. In e-bikes, such as an Addmotor, you also have the battery and electronic components to contend with – but do not fret, the guide guides you through it.
Honestly, your initial ride should be all about getting used to it. Plug in the battery completely, turn on the bike, and put it on the lowest assist. Now, go to some quiet area such as a side street or an empty parking lot. Try your brakes, pedal the gears a little, and get a feel of your throttle if your bike has one. And don’t forget to set the seat and handlebars according to your height.
Some folks really do like building one from the ground up, and why not? It’s a cool project if you’re a tinkerer. The steps typically go something like this:
Choose a frame to begin with.
Install the motor (hub or mid-drive).
Mount the battery.
Connect the wiring to the controller.
Double-check everything and give it a test.
It’s not for everyone, but if you’re a DIY type, it can be a pretty satisfying way to get rolling.
You’ll usually get a manual right in the box. If not, most brands (Addmotor included) post them online as a PDF download. Some even share video tutorials that show the process step by step.
Well, then don’t! There’s no rule saying you have to do it on your own. Lots of bike shops offer assembly services, and even some big sporting goods stores will do it for you. A quick search for “e-bike assembly near me” should pull up options close by. Sure, it costs a little extra, but the peace of mind knowing a pro set it up is worth it for many people.
Yes, of course. Most companies offer manuals as free PDF downloads right on their websites. Just make sure you grab it from an official source. For example, searching something like “Addmotor Electric Bike Manual PDF free download” usually brings up the brand’s own page or an authorized dealer.
Obviously, the biggest difference is the electrical system. On a regular bike, you’re only worrying about mechanical parts – wheels, brakes, pedals, handlebars. On an e-bike, you’ve also got a motor, a display, and a battery to set up. So, you just need to be a little more careful when tightening bolts near wiring or when mounting the battery. Other than that, the process feels pretty familiar.
Yes, absolutely. Addmotor has video guides on their YouTube channel and website. These are super helpful because you’re literally watching someone build the same bike you have at home. It’s almost like having a friend in the garage showing you what to do step by step.
Why not? Beginners do it all the time. Addmotor actually designs their bikes to be beginner-friendly when it comes to assembly. If you take it slow and follow the instructions, you can usually get it done in under an hour. In fact, many first-timers end up enjoying the process.
Well, here’s an easy trick: don’t check out without a coupon. Sites like GetTopDiscounts often have Addmotor codes, and sometimes even free shipping deals. Using one of these saves you money right away, which means you’ll have extra left over for accessories like racks or lights. And let’s be real – saving money always makes the purchase feel even better.
Conclusion: Ride With Confidence
Assembling your new Addmotor e-bike doesn’t need to be intimidating. With this DIY e-bike setup guide, you’ll move smoothly from unboxing to your first ride. Just take your time, follow the steps, and avoid the common mistakes we highlighted.
And remember – if your e-bike hasn’t shipped yet, or if you’re still considering your purchase, make sure to grab an Addmotor coupon code free shipping to save on your order.
Shopping through Get Top Discounts not only ensures you’re getting authentic deals, but it also helps you enjoy your ride with a little extra money left in your pocket.
Your new adventure starts now.